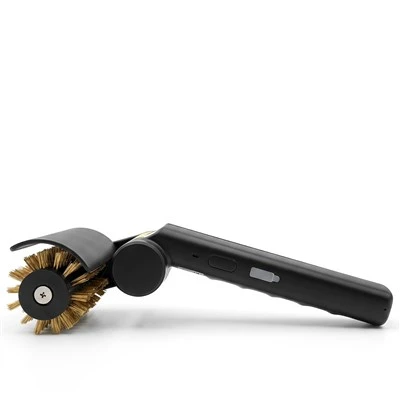
Cleaning the brushes of a Random Navigation Robot Vacuum is an essential maintenance task that can significantly enhance the performance and longevity of your device. As a supplier of Random Navigation Robot Vacuum, I understand the importance of proper maintenance and will guide you through the process step - by - step.


Why Clean the Brushes?
The brushes in a Random Navigation Robot Vacuum play a crucial role in picking up dirt, dust, hair, and debris from your floors. Over time, these brushes can become clogged with all sorts of materials. When this happens, the efficiency of the vacuum decreases. The robot may not be able to pick up dirt as effectively, and it might start leaving streaks or patches of dirt behind. Moreover, a dirty brush can put extra strain on the motor, potentially leading to premature wear and tear and reducing the overall lifespan of the vacuum.
Tools You'll Need
Before you start cleaning the brushes, gather the following tools:
- A pair of sharp scissors or a utility knife
- A small brush, such as an old toothbrush
- A cleaning cloth or microfiber towel
- A small container for collecting debris
Step 1: Power Off and Unplug the Robot Vacuum
Safety first! Always make sure the Random Navigation Robot Vacuum is turned off and unplugged from the charging dock. This prevents any accidental starts during the cleaning process, which could cause injury.
Step 2: Remove the Brushes
The process of removing the brushes may vary depending on the model of your Random Navigation Robot Vacuum. Generally, you'll need to flip the vacuum over to access the brush compartment. Look for release buttons or latches that hold the brush housing in place. Once you've located them, press or slide the buttons to open the compartment. Then, gently pull out the brushes. Some models may have side brushes as well, which can usually be removed by twisting them counter - clockwise.
Step 3: Remove Loose Debris
Take the brushes and gently tap them against the side of the container to dislodge any loose dirt, dust, or hair. You can also use the small brush to sweep away any debris that is stuck to the brush bristles. Be careful not to damage the bristles while doing this.
Step 4: Cut Away Tangled Hair
One of the most common problems with robot vacuum brushes is tangled hair. Use the scissors or utility knife to carefully cut away any hair that is wrapped around the brush. Start from the end of the brush and work your way along, being cautious not to cut the bristles. You may need to hold the hair taut while cutting to make the process easier.
Step 5: Clean the Brush Housing
While the brushes are removed, take the opportunity to clean the brush housing. Use the small brush to remove any dirt or debris that has accumulated inside. You can also wipe the housing with a cleaning cloth to ensure it is free of dust.
Step 6: Wash the Brushes
Fill a sink or a small basin with warm, soapy water. Submerge the brushes in the water and use your fingers to gently agitate them. This helps to remove any remaining dirt and grime. Pay special attention to the base of the bristles, where dirt tends to accumulate. After a few minutes, rinse the brushes thoroughly under running water to remove all the soap.
Step 7: Dry the Brushes
Shake the brushes gently to remove excess water. Then, lay them on a clean towel to air dry. Make sure they are completely dry before reinstalling them in the vacuum. This may take a few hours, depending on the humidity and temperature in your environment.
Step 8: Reinstall the Brushes
Once the brushes are dry, carefully place them back into the brush housing. Make sure they are properly aligned and seated. Then, close the brush compartment by pressing or sliding the release buttons or latches back into place. If you removed the side brushes, twist them clockwise to secure them.
Step 9: Test the Vacuum
After reinstalling the brushes, plug the Random Navigation Robot Vacuum back into the charging dock and turn it on. Let it run for a few minutes to ensure that the brushes are working properly. Listen for any unusual noises or vibrations, which could indicate that the brushes are not installed correctly.
Frequency of Brush Cleaning
How often you should clean the brushes depends on how frequently you use the vacuum and the type of debris it picks up. As a general rule, it's a good idea to clean the brushes at least once a month for regular use. If you have pets or a lot of long - haired people in your household, you may need to clean the brushes more frequently, perhaps every two weeks.
Additional Tips
- Check the Belt: Some Random Navigation Robot Vacuums have a belt that drives the main brush. If your model has a belt, inspect it for signs of wear and tear during the brush cleaning process. Replace the belt if it is cracked, stretched, or damaged.
- Use Compressed Air: If you have compressed air available, you can use it to blow out any hard - to - reach debris from the brush housing and other parts of the vacuum.
- Keep Spare Brushes: Consider keeping a set of spare brushes on hand. This way, you can quickly replace the dirty brushes and continue using the vacuum while the dirty ones are being cleaned.
Conclusion
Cleaning the brushes of your Random Navigation Robot Vacuum is a simple yet important maintenance task that can keep your vacuum running smoothly and efficiently. By following the steps outlined above, you can ensure that your Random Navigation Robot Vacuum continues to provide excellent cleaning performance for years to come.
If you're in the market for a high - quality Random Navigation Robot Vacuum or need more information about our products, such as the Random Gyro Robot Vacuum Cleaner or Robot Sweep Mop, we're here to assist you. We welcome you to contact us for procurement and further discussions. We are committed to providing you with the best products and services to meet your cleaning needs.
References
- Manufacturer's user manual for Random Navigation Robot Vacuum
- Industry best practices for robot vacuum maintenance